Monday, May 24, 2010

Austin to Glacier NP


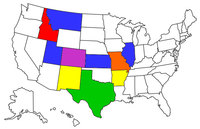
Our first big trip is indeed a big trip. We plan to go on a loop route from Austin to Glacier National Park.

Our initial tendency was to try to fit too much in.  We settled on a policy of "don't drive and see things in the same day", though there are a couple of exceptions below.  We tried hard to find a couple of points where we could stay 3 or 4 nights with enough "to do" to justify longer stays.  We had to cut off some nearby  parks and monuments as we just didn't have enough days.  Here is our working itinerary.

TOTALS FOR TRIP:   4203 MILES,   3 DAYS:3 HOURS
Day 0 (June 25 – Fri)
Drive to
Abilene TX
Segment:  12621 Scofield Farms Dr, Austin 78727 to Abilene TX
Distance:  217 miles, 4 Hrs:18 Min
Stay at Abilene KOA, 4851 W Stamford St, Abilene TX,  325-672-3681
Day 1 (June 26 – Sat)
Drive to Cedar Rail RV Park, Raton NM
Segment:  
4851 W Stamford St, Abilene, TX  to Raton NM
Distance: 510  miles, 9 Hrs:06 Min
Stay at Raton, Cedar Rail RV Park & Campground
            At the top of Raton Pass, Exit 460 on the I-25
               
Raton NM  87740
                575-445-8500 Rhonda
                Going North on I-25 - take NM exit 460 (same as CO exit 0 (Zero))
                Cedar Rail is located on the East  Side of I-25
Day 2 (June 27 – Sun)
Drive to Rocky Mountain NP

Segment:
Raton NM to Rocky Mountain National Park, CO
Distance: 
277 miles, 4 Hrs:48 Min
Stay
Spruce Lake RV
Resort, Pg 200 Woodalls,
           
Site 98, water & Elec only
               
1050 Marys Lake Rd,           Estes Park CO, 80517
              
800-536-105
Day 3 (June 28 – Mon)
Sight See in Rocky Mountain NP (Page 125 AAA)
Stay in
Spruce Lake RV Resort
 Day 4 (June 29 – Tues)
Drive to Billings MT
Segment: Rocky Mountain National Park, CO to Billings, Montana
Distance: 
541 miles   Time: 8 hrs., 27mins
Stay Billings KOA ($47) – show that we now have KOA card for add’l discount
           
Site 130 – Water & Elec only
                www.billingskoa.com
               
547 Garden Ave, Billings MT  59101
                800-562-8546 (res), 406-252-3101 (info)
                Off I-90 @ exit 450
Day 5 (June 30 – Wed)
Drive to St Mary MT
Segment: 
Billings, Montana to Browning, Montana
Distance:  378 miles   Time: 6 hrs., 40mins.
Stay St Mary Glacier Park (KOA) 106 West Shore, St Mary MT  59417
            Site given at check in – Full Hook-up, Pull Through
                800-562-1504 (reservations),  406-732-4122 (Info)          
DAY 6 (July 1 – Thurs)
Sight See Red Bus Tour Glacier NP  (Page 97 AAA) 406-892-2525

International Peace Park Tour (passports are needed) (6 ½ hours)
Take National Park Pass for re-entry into park
Leave from St Mary Lodge at
10:00 a.m.  (arrive 10-15 min early)
Stay St
Mary Glacier Park (KOA)

DAY 7 – (July 2 – Fri)
Drive to Coram MT
Segment
:  St. Mary MT TO Coram MT
Distance:  93:2 Miles, 1Hr, 49 Min
Tour West side of Glacier
Stay in Coram MT – North American RV Park 800-704-4266

            10640 Hwy 2 East, Coram MT (Lisa)
            With Good Sams Discount - $34.20/night - $146.38 total
                                 

DAY
8 (July 3 – Sat)
Tour West side of Glacier
Red Bus Tour – Mountain Majesty

Take National Park Pass for re-entry into park
Leave from
Apgar Transit Center @ 1:30 pm
Stay in Coram MT – North American RV Park 800-704-4266
 

Day 9 (July 4 – Sun)

Tour West side of Glacier
Fire Works in White Fish

Stay in Coram MT – North American RV Park 800-704-4266
Day 10 (July 5 – Mon)
Tour West side of Glacier
Stay in Coram MT – North American RV Park 800-704-4266
Day 11 (July 6 – Tues)
Drive to Arco ID (Crater of the Moon)
Segment: 
Coram MT, Montana to Craters of The Moon National Monument, ID
Distance:  408 miles  Time:  7 hrs, 24 min 
Stay at Mountain View RV Park
            705
W. Grand Avenue, Arco, ID 83213
            Office: (208) 527-3707
            Cell: (208) 589-5119 Jackie)
            $27/night including Good Sams
            Breakfast included
 

Day 12 (July 7 – Wed)

Sight see Craters of the Moon (page 46 AAA)
Stay at
Mountain View RV Park
Day 13 (July 8 – Thurs)
Drive to
Torrey UT ( Capitol Reef NP)
Stop to see Golden
Spike NM on the way
Segment: Arco ID to
Torrey UT
Distance:  455  miles  Time: 7 hours 36 min
Stay in
Thousand Lakes RV Park, Near Capitol Reef
            Thousandlakesrvpark.com
           
Torrey UT, Located 1 mile West of Torrey on North Side of Hwy 24
            800-355-8995
 

Day 14 (July 9 – Fri)

Sight see Capitol Reef (page 159 AAA)
Eat at the Torryey Grill Western Cookout,
6:30, 7:00, 7:30
Stay in
Thousand Lakes RV Park 
Day 15 (July 10 – Sat)
Sight see Capitol Reef (page 159 AAA)
Stay in
Thousand Lakes RV Park 
Day 16 (July 11 – Sun)
Drive to
Moab UT
Segment: 
Torrey UT to Moab UT
Distance
156 miles  Time:   2 hours, 45 min
Stay In Riverside Oasis RV Park Inc 877-285-7757
            1871 North Highway 191, Moab UT  84532 
Day 17 (July 12 – Mon)
Tom – Fiery Furnace Tour – Arches National Park 
4:00 pm
Stay at Riverside Oasis RV Park Inc,
Moab UT 
Day 18 (July 13 – Tues)
Sight See Arches NP (Page 152 AAA)
Segment: 
Moab, UT to Arches National Park, UT
Distance:  39.4 miles  Time: 1 hr., 1mins.
Stay at Riverside Oasis RV Park Inc, Moab UT 
Day 19 (July 14 – Wed)
Sight See Canyonlands NP (Page 158 AAA)
            River Tour out of
Green River?
Stay at Riverside Oasis RV Park Inc,
Moab UT  
Day 20 (July 15 – Thurs)
Drive to
Colorado Nat Monument (Fruita, CO/Grand Junction?)
Segment: 
Moab, UT to Fruita Co. (Colorado National Monument, CO)
Distance:  99.2 miles  Time: 1 hr., 37mins.
Stay Monument RV Resort
            607 Hwy 340, Fruita CO
            888-977-6777
Day 21(July 16 – Fri)
Sight See
Colorado NM (Page 53 AAA)
Stay Monument RV Resort 
Day 22 (July 17 – Sat)
Drive to Gunnison , CO
Segment: Colorado National Monument, CO to Black Canyon of The Gunnison National Park, CO
Distance:  137 miles Time: 2 hr., 33mins.
Stay Gunnison KOA
            105 County Road 50, Gunnison, CO  81230
            800-562-1248
 
Day 23 (July 18 – Sun)
Sight See Black Canyon of the Gunnison (Page 45 AAA)
Stay
Gunnison KOA 
Day 24 (July 19 – Mon)
Drive to Great Sand Dunes NP
Segment: 
Black Canyon of The Gunnison NP, CO to Great Sand Dunes National Park and Preserve, CO
Distance:  148 miles   Time: 3 hrs., 31mins.
Sight See Great Sand Dunes (Page 105 AAA)
Drive to
Raton, NM
Segment:
  Great Sand Dunes to Raton, NM
Distance: 109 miles   Time:  2 Hr, 23 Min
TOTAL DRIVE FOR DAY:  257 miles  5 Hrs, 54 Min
Stay at Raton, Cedar Rail RV Park & Campground
            At the top of Raton Pass, Exit 460 on the I-25
               
Raton NM  87740, 575-445-8500 Rhonda
                Going south on I-25 - take NM exit 460 (same as CO exit 0 (Zero))
                This exit is shared with the truckers weigh station – watch for exit closely, resist urge to
                Pull out to pass a semi, after you exit – follow blue signs for camping.  Cedar Rail is located on the East          
                Side of I-25
                If we are getting in late – call ahead & Rhonda will turn lots of lights on for us      
                Back in site with great view!
 Day 25 (July 20 – Tues)
Stay at Raton, Cedar Rail RV Park & Campground
 
Day 26 (July 21 – Wed)
Drive to Capulin Volcano NP
Segment:
  Cedar Rail RV to Capulin Volcano NP
Distance:  47 Miles, 57 Min
Drive to Palo Duro
Segment: 
Capulin Volcano NP  to Palo Duro State Park
Distance: 225 miles     Time:  4 Hrs, 36 Min
TOTAL DRIVE FOR DAY:  272 MILES, 5 HRS, 34 MIN
Stay Palo Duro State Park, 11450 Park Road 5, Canyon, TX 79015, 806-488-2227  / info@palodurocanyon.com  
           
Loop Mesquite or Sagebrush
                $25/night – water & 50 amp elec (no sewer)

            Park is open 8:00 a.m. - 10:00 pm.  If arriving after 5:00, call 806-488-2227 for late arrival  instructions. 
            CXL fee up until 7/18 is $5.00.  After that – 1st night charge
                Park entrance fees:  $5/person/night – or buy Tx state Park Pass for $60 when you get to the park.  The
                Pass is good for 1 year.
 
Day 27 (July 22 – Thurs)
Stay in Palo Duro

See TEXAS Musical Drama
Eat at BIG
TEXAN STATE Ranch 
Day 28 (July 23 – Fri)
Sight See Palo Duro (see play) ( Page 68 AAA)
Stay Palo Duro
 
Day 29 (July 24 – Sat)
Drive to
Austin
Segment: 
Palo Duro Canyon State Park, TX to 12621 Scofield Farms Drive, Austin 78727, Texas
Distance:  487 miles  Time: 8 hrs., 49mins.

Saturday, May 22, 2010

Learning to Back Up a 5th Wheel

We felt pretty competent at backing up boat trailers and travel trailers.  Terri would normally direct and I would normally drive.  We could fit into most tight spots, though not as tight as others claim.  (I have seen stories on the web about people able to back things into garages with only inches of clearance.)  We understood that the process for backing up a 5th wheel is a little different since the pivot point is over the rear axle instead of extended behind the rear bumper.  This makes sharp changes in direction much harder as the vehicle looses "leverage" on the trailer.  The maximum turning angle of the RV is higher since the truck can be at a 90 degree angle to the RV.  We very much underestimated the differences.

We picked up the new trailer on a Saturday morning.  There was a Cabela's store across the highway from the RV distributor and they have a large empty parking lot so we headed there to practice.  The lot had semi truck style long, 45 degree angled slots, much like you might find in an RV park.  I started by doing what I used to do with a travel trailer, pull the truck and RV straight on the left side of the road to back to a spot on the right.  I pulled past the target spot, then started backing to turn the trailer toward the spot.  Once the rear of the RV was pointed at the entrance to the spot I started reducing the angle between the truck and the RV, but the RV kept turning!  Terri kept saying to cut it the other way, and I "communicated" back to her that it was cut all the way the other direction, yet the RV kept going in the wrong direction.  We tried over and over with absolutely no success and quite a bit of relationship stress.

The problem, we agreed, was that I was "over steering" and given the difference in reaction of the RV due to the pivot point being over the axle, we needed to do "something" different.  I was quite concerned, because the lot where we intended to store the RV had much less space to maneuver and had 90 degree parking with 12' spots filled on both sides.  We knew we had some time to learn, as we were planning to pull the RV to a monthly RV spot instead of parking it right away, but we had no plan on how to learn what to do.  And we still had no idea what "something" we needed to do differently.

I researched on the internet and there was very little information of any real use.  The best information I found was on this web site.  http://www.newbiedriver.com/articles/Backing/Backing.htm about semi truck backing.  After reading, closing my eyes and imagining me doing the process, I thought I finally understood (better).  After two months at the RV park, it was time to bring the new RV home and put it away.  Before I began practicing, I made a small wood scrap scale replica of the truck and RV with the pivot point joined by a nail.  I went through the planned sequence in my mind, positioning the replica to help visualize which way I was turning the truck steering wheel to achieve what effect.  We went to a local high school, set up cones to mark where the target parking spot was, and went about practicing.  On the 1st try, we did pretty good backing into a 90 degree spot to the right.  2nd try was better.  3rd try went 90 degrees to the left.  All were "acceptable" as there were no obstructions to worry about hitting.  We tried other various approaches with less success.

Here is my simple process (summarized in step 5 below).  Others may have different methods that make sense to you.
  1. Approach the spot in the street with the RV and truck on the same side as the target spot.  
  2. When the truck axle is a little past the target spot (this will vary with the wheel base and turn radius of the truck and length of trailer), cut the truck wheels sharply to cross to the other side of the street.  This creates an angle between the RV and the target spot.
  3. When the nose of the truck reaches the opposite side (see note), cut the wheels sharply to straighten THE TRUCK ONLY to be parallel to the street.  This creates an angle between the truck and the RV. (NOTE:  room must be available to turn the truck back to straight with the RV.  If there are "objects" (cars, fences, etc.) then you may only be able to go the the middle of the road in creating this initial angle.  You can also not go parallel to the street.)
  4. Examine the angle between the truck and RV and where the tail of the RV is now aimed.  Decide if you need more or less angle to hit the entrance of the spot before you begin backing.
  5. As you back, control the angles between the RV and the spot and between the truck and the RV considering these three manditory steps.
    - Create an angle to turn
    - Follow the RV to the spot
    - Undo the angle.  You can not change the direction of the rear of the RV until the truck is lined up straight with the RV.
  6. On each maneuver, it is better to end by setting up for the next maneuver than it is to start the next maneuver with the truck and RV in the wrong orientation (angle).  (The truck is more agile than the RV.)  For example, if you are pulling forward to turn the RV clockwise (you will have the truck front wheels turned to the left), finish by turning the truck wheels to the right to create an angle to the RV that allows more clockwise RV rotation at the start of the backing up process.  This allows you to choose to increase the RV turn angle or follow the RV along its path to the target spot. This is exactly what step number 3 does above.
  7. Always remember you can pull forward to adjust.  Always remember you can start over.  In radical situations you can unhitch, change the angle of the truck, and rehitch.  So what if someone else can do it better.  You CAN do it.
So we went to the storage lot to put the RV away.  The promised spot was filled by something else.  We left and started looking for a storage lot with numbered and more "friendly" spaces.  Found one that was acceptably close and we are much happier with the process.

We are still novice 5th wheel backers, but we plan to have many scenic RV spaces that will require backing in on our vacation, and we are not afraid to try.

Tom

Thursday, May 20, 2010

BUYING OUR NEW RV

For the first 3 years we owned our Pilgrim Travel Trailer, we had only gone out for long weekend trips. For 2 to 3 days at a time, our trailer with the small slide was great! During the summer of 2009, we took a week long vacation in San Marcos TX. After spending a full week in our travel trailer, we decided that if we planned to take longer vacations or live part time in a RV, we would really need more room. It was quite close quarters for the two of us and the two dogs.

During the summer of 2009, we attended our first RV show held in the parking lot of the Round Rock Express/Dell Diamond parking lot. At that time, we weren’t thinking of upgrading to a larger unit, but just enjoyed looking at all the options that are available. Having only the Chevy Tahoe as a tow vehicle, we realized we would be very limited to what we could pull.

Through the winter of 2009 we started talking more about upgrading. There are so many companies with many choices and options. It was easy for us to rule out buying a Class A motor home. First – they are huge, second – you have to pull another vehicle behind wherever you go. We looked at travel trailers that could still be pulled with an enclosed vehicle (Suburban). We liked that idea as Annie & Zoe would still have a place in the back to ride, and if the whole family wanted to take a trip there would be plenty of room for everyone as well as our stuff. Because of the towing limits of SUVs, the travel trailer would be limited in size due to weight – so would it really be worth buying a new trailer that wasn’t really much larger than our current one?

The third option – a 5th wheel – would fill all of items on our wish list, but would require that we buy a “real” truck. I was concerned about not having an enclosed vehicle to travel in and haul. I really liked our Tahoe. On the way down to a RV show in San Antonio in the winter of 2009/2010, we actually stopped at a truck dealer, just to talk to a salesman about full size diesel trucks, get answers to questions and even got to take a test drive. They are much larger than our Tahoe!

While at the show, we collected brochures and toured all the RVs. We sat in all the chairs and on all the couches, laid down on all the beds, stood in the showers and sat on the toilets. By the time we left the San Antonio show, we had pretty much picked our “dream RV,” the Montana 3400RL. We thought it was beautiful and the quality was very good. At this point in our lives we didn’t know if we were ready to move all the way up to an RV that we would be happy with for many, many years, or if we should look for something used or lower quality and then upgrade again in a few years.

Once home, we started making lists of options we liked or didn’t like. How many slides did we want, which floor plan for kitchen, bathroom layout, etc? We made a list of must haves vs. nice to haves vs. do not wants and rated them on a scale of 1 to 10. We realized that RVs can feel a lot different than they look in the brochure.

We looked at ads on Craig’s List and in the news paper. We even went to see one that we liked the floor plan of, but it was several years old and really looked like it had been “lived” in. So, we continued to look. I called another person who had an ad for a used 2010 Montana on Craig’s List. He had already sold his RV, but gave me the name of a Montana RV dealer & salesman in Indiana that I should call for a price. I told the salesman which Montana we were interested in, and he quoted me a price over the phone. We went to Camper Clinic II in Buda TX (a local Montana Dealer) hoping they would have a used RV that we liked. We liked one they had on consignment, but the price was too high. And, of course, we compared everyone with our dream Montana. We told the Camper Clinic Salesman, Mario, that we liked the Montana 3400 RL floor plan and told him the price we were quoted from the dealer in Indiana. Of course, we would prefer to buy from a local dealer. There was going to be an RV show in Austin that weekend that Camper Clinic would be attending. A representative from Montana was also going to be there, and often, if you buy on the first day of the show, you can get a very good deal. So, we headed to the RV show on Thursday (the first day of the show) They worked with us comparing their price with the price of the dealer in Indiana. In the end, Camper Clinic II matched the price in Indiana and we ended up buying our Montana 3400RL from them. And – we didn’t have to drive to Indiana to pick it up! We just love our RV!

Wednesday, May 19, 2010

Getting Started

We have always fantasized about taking slow RV trips around the country, seeing the sights and not being in any particular hurry.  Since Tom is still working, our first long RV trip will focus more on "seeing the sights" than on "not being in any hury".  

Since we felt our Pilgrim travel trailer was too cramped for an extended stay with our two dogs (Annie and Zoe), we decided to start looking at 5th wheel trailers with opposing slide outs.  That also meant we had to get rid of our Chevy Tahoe and look for a suitable truck.  We were open to both new and used for both the truck and trailer, depending on what we found for the money.  Tom focused on the truck and Terri focused on the trailer.

Tom started looking at used trucks in and around Austin with an intention to "over buy".  By that, he thought it better to buy a truck that would pull any trailer weight that came up as a good deal.  He found the winner on Craig's List.  A 2006 GMC Sierra SLT 3500 dually (two rear tires on each side) crew cab (4 full doors and full rear seat), Onyx Black, 6.6L duramax diesel (LLY), Allison 6 speed transmission with 175,000 miles.  That sounds like a lot of miles, but these kinds of engines are meant to last over 500,000.  It had been used as a commercial delivery truck for a local business, making regular trips between Austin and Houston.  We got a good price for it but had to buy 6 new tires (Michelin LTX M/S), running boards (Ionic 5" black), bed cover (BacFlip G2) and a locking tail gate.  The previous owner used it as his personal truck and it is "blacked out" with dark tinted windows, smoked running lights, etc.  Looks pretty good.

Since we expected to pull our trailer through mountain areas, Tom wanted to increase the power of the engine.  GMC tunes the engine to pass emissions, not for power or mileage.  He decided on using a PPE Xcelerator that reprograms the engine computer to increase mileage and torque.  On the economy setting (level 1) not pulling the trailer, the mileage went from 16mpg to 19mpg in mixed city/highway driving.  Pulling the trailer in the power setting (level 2), mileage went from 9mpg to 11mpg.  But the real reason is the extra torque to pull up mountains. (increases factory 360HP and 660 lb-ft to 450HP and 820lb-ft)